Shooting and Maintaining a
Flintlock
This information applies to rifled and smoothbore long arms and pistols By
John Fuhring What, no video??? No, you are going to have to read and
think.,
but there is detail here that will teach you more than any video can. I hope you find this essay interesting and enjoyable. This essay is presented to you free of charge and without any annoying commercials.  A flintlock showing
the cock, jaw holding the flint, frizzen, primer pan and frizzen
spring.
Inside is the
tumbler, bridle, trigger sear, trigger sear spring and mainspring.
All flintlock locks have these features with variations on minor design issues. For 400 years people have been making gunlocks to this design. Foreword
Before writing another word, I want to warn you that I am
not a
qualified gunsmith and there is nothing in the following essay that you
may take as "expert advice." I hope that I have approached
everything with common sense and with good and rational observations,
but that is something you must decide for yourself. Since I
am
not a professional nor am I charging you anything, I am not responsible
for your safety, especially if you don't understand what I am trying to
say and you go ahead and do something foolish. If there is
anything that you think is foolish or dangerous for you to attempt,
don't attempt it, but write to me or seek out professional advice from
a licensed gunsmith. Always error on the side of safety since
the
person responsible for your safety and the safety of those around you
is YOU, yes you.Please forgive me if I seem a bit snarkey, but if a guy has no mechanical skills or proper tools, perhaps he shouldn't even own a flintlock. Reenactors who don't know how to keep their muskets shooting or cared for in a "armory bright" condition would perhaps be advised to get into some other aspect of reenacting other than that of a common soldier. On the other hand, if you have a sincere desire to learn about how to use and care for these firearms and are willing to really work at it, perhaps this is as good a place to start as any. The purpose of this essay is to tell what I know about flintlocks, how they work and how to maintain them including the flints, the frizzens, the loading and the cleaning. If you find that I have made any serious mistakes or something doesn't work for you, please write me at my geojohn mail address and not in my guestbook and tell me about it. The last thing I want to do is spread bad information about black powder shooting because, quite frankly, there is already way too much of it out there as it is. I know that I have created a very wordy essay, but I hope it is an easy and fun read and it does have some nice pictures. Read what you want, skip around, look at the pictures. It's free, there is no password registration required and nobody is going to spy on you or charge you anything or make you watch annoying commercials, I promise. This essay is divided into several chapters that may be read individually or continuously: 1) An introduction to flintlocks 2) Why flintlock shooting is so much fun. 3) An historical discussion on iron and steel, how flintlock guns were made back then and how they are made today. 4) How a flintlock is able to set the primer charge burning and tips on obtaining reliable ignition. 5) Safety concerns. 6) Bullets for shooting and hunting. 7) The importance of managing black powder fouling with a proper shooting grease. 8) Steps in loading and firing a flintlock firearm. 9) A waterless and efficient method of cleaning a flintlock that both protects the barrel and is fast and tools you will need. 10) Keeping your flintlock in repair including some micro-blacksmithing tips and techniques. 11) Conclusions and things to think about. Please feel free to skip around and if you mark this website, you can come back later and read other chapters if you find them useful and have more time. Introduction
I want to say something about
the technical skills necessary to shoot and maintain any flintlock.
Flintlock firearms, long or short, rifled or smoothbore, are
much
more
complicated to load and to fire than any other firearm because you must
have or want to develop several different skills.
This point can not be emphasized too strongly, FLINTLOCK
SHOOTING
IS FOR THOSE WHO HAVE APTITUDE AND MECHANICAL SKILLS OR WHO ARE WILLING
TO LEARN THEM. It takes
skill and the right accessories to simply load firearms
such as these and then knowing how to work a complex mechanism so you
get good sparks from a piece
of sharpened
rock is a skill not everybody has or wants to learn. Related
to
that, maintaining a
sharp piece of rock (the flint) is an art and a science that most of
humanity hasn't practiced since the Stone Age and very few people know
how to chip flints like our long dead ancestors did.
Flintlock
shooters must know or must learn how to perform this art and science
and hold this fickle firestick on target while the primer powder
decides if it is going to set off the main charge or not. No,
flintlocks aren't for everybody, but if you are among the lucky few who
get infected with the spirit, they are great fun.I'd like to take this opportunity to say something to hunters about how effective these weapons are. Yes, they were designed to kill and if you accidentally shoot somebody or yourself, the odds are very good that somebody is going to die. It is true that the bullets are huge lead things that weigh many times more than a modern rifle bullet, but the bullet enters a victim's body at sub-sonic speeds and thus will not set up a large shock wave that creates a huge "wound channel" of destroyed tissue. Unlike a modern high velocity rifle bullet, a large .69 caliber musket ball passing straight through living flesh, actually makes a much, much smaller wound channel and does not destroy tissue at any great distance from the path of the bullet. On the other hand, if one of the larger musket balls hits your arm or leg bones, it is likely your whole limb around and below the wound will have to be amputated, as it was in the old days, because tissue damage caused by shattering bone would be that extensive. The point of bringing this up is to notify people that not only is the range and accuracy of a flintlock very limited, but compared to modern high velocity rifles, the killing power of these weapons is definitely inferior and therefore shot placement well within the killing zone of a game animal is of supreme importance. No shot should be attempted unless it is almost certain that the bullet will land within the kill zone and you will know your own capability and your gun's capability only if you spend a lot of time with it at the range before taking it hunting. Having said that, both the entrance wound as well as the exit wound (these bullets will exit) will be large and because there is relatively little tissue damage, bleeding will be heavy and so following a "blood trail" should be pretty easy for those physically fit enough to do some hiking after a wounded animal. It really need not be said that if you aren't physically fit enough to do this kind of tracking, your hunting days are over. So, how did I come to my recent "conversion" and why did I get back into flintlock shooting? Just recently I converted a beautifully made and fun to shoot little .32 caplock target pistol into a flintlock and I liked the results so much, I bought an identical caplock pistol and converted it too. Now I have a beautiful pair of 18th Century style "dueling pistols" that I am very proud of and I've put that story on my website. While I was working on the conversion of the first caplock and getting it to work really well, I had some thoughts and ideas that I thought I'd practice on my .45 flintlock Hawken rifle that I built from a kit about 40 years ago. My Hawken is a beautiful piece, but I was never satisfied with the way the lock worked. I made some minor mechanical changes to the lock, reduced the force of the mainspring so it wouldn't shatter the flints and deeply hardened the frizzen to almost diamond hardness and now I just love the rifle. Success with these flintlocks made me seriously consider getting the 1777 cavalry musketoon which I've already described at some length on another web page. I now have five flintlocks, two .32 caliber pistols, a .50 caliber pistol, the .45 caliber rifle and a .69 caliber French model 1777 musketoon, some of which I mentioned above. I have recently come to a better understanding of the flintlock so that now I get better sparks (which means that ignition of the primer charge is more reliable) and my flints last longer. Finally, I have to admit that although I've owned and shot a flintlock rifle for decades, I am no flintlock expert, by any means. The purpose of this essay is to introduce you to flintlock shooting so that you have a place to start, especially if you do not have access to a real flintlock shooter for good advice. This essay contains my observations and opinions that may or may not be correct, so it is up to you to experiment for yourself and seek other, better ways of doing things that suit your way of shooting. In my opinion, experimenting, trying things and getting immediate results is a big reason shooting black powder is so much fun. Why a flintlock?
Before I begin I'd like to say something about why
I find
flintlocks worth owning and shooting. First, I love to do
more than simply load clips and bang off as many rounds
as I can in as short a period of time as possible. To me,
that is
not a fun way to spend my time. I much prefer the slower, make
every shot count, that shooting black powder makes
necessary. I
actually love to perform all the steps necessary to load a black powder
revolver, or muzzle loading firearm. Add to all that the
sheer
fun of owning and shooting something that is so utterly historical and
so very cheap to shoot and you have something a guy could really get
into.My new found appreciation If you like a big jolly blast of smoke, sparks and flame from your FIREarm, the flintlock is the ultimate. With a big blast of smoke and flame out the muzzle, you get another cloud of smoke and flame from the primer pan from the powder set off by the sparks from the flint and steel of the frizzen. As with any black powder arm you load yourself, you can spend endless happy hours varying the charge and the manner of loading the bullets. If your piece has rifling, you can shoot both round balls and elongated bullets, but if your gun is a smoothbore, you can load it with a large round ball or you can load it with round shot and use it as a shotgun. Finally, there is no cheaper way of shooting than a flintlock. As cheap as shooting a caplock is, the caps are expensive and getting more so because few gun stores have them and buying them anywhere requires paying either a "hazardous shipping fee" or a large markup. If you have an excellently functioning flintlock, ignition of the powder charge is almost guaranteed and you can get as many shots out of a good flint as you can out of a tin of caps (but only if everything is just right). If you have source of cut agates and stone working tools, you can make your own superior gunflints for free. Speaking of cost, if you cast your own bullets from scrap lead, your major expense, after initially buying everything, is just for the powder and a flint or two now and again. Iron And Steel Back in the 16th through the early 19th
Centuries, iron smelting consisted of two very different forms, cast
iron and wrought iron. In those days, he most common and most
useful form of iron was that produced by the low temperature wrought
iron
process. In this process the iron ore (iron oxide) was slowly
converted to a "bloom" of metallic iron without the iron actually
melting at any point
in the process. This was a rather simple and economic way of
producing a very useful form of iron. In the cast iron process,
the temperatures are much higher in the smelter and the iron actually
melts so that it can be cast in molds. The problem with cast iron is the
melted iron mixes freely with the carbon in the smelter's furnace and
when the iron is removed from the cast, the resulting iron is saturated with carbon and is very
brittle and because it is so brittle, it can not be hammered into useful shapes. Except for
large cannons, cast iron was not used in gun barrels or the lock mechanisms of
muskets, pistols or rifles.and How Gun Barrels Were Made Then And Now Wrought iron is an almost pure form of iron without any carbon in it to give it strength or hardness. Wrought iron is very malleable and can be 'wrought' or hammered into useful shapes by iron workers (blacksmiths), but it can not be hardened by quenching the hot iron in water, in fact, if you heat wrought iron and plunge it into water, it only gets softer because what little carbon it had is oxidized out of it. Wrought iron has slag and other impurities from smelting that tend to form layers within the iron and therefore wrought iron is not a homogeneous iron and is considerably weaker than even mild steel. The surface of this kind of iron can be turned to steel by the process of "case hardening" or carburizing where carbon is added to the surface of the metal when it is red hot and then that surface is made super hard by quenching the red hot piece in water. Back in those days, steel making was a kind of a "black art" or perhaps a "blacksmith's art" and so only small parts that went into the lock mechanism were converted into steel, everything else was made of wrought iron. The process of carburizing the surface of iron makes parts that are tough and hard, don't wear out and will spark when struck by flint. The case hardening process was well understood by the smiths of the 18th Century with their big forges, but today we can do the same thing with simple gas torches and inexpensive hardening compounds. From the very beginning until fairly recently, the barrel tubes of flintlock guns were made from a long "ribbon" of wrought iron that was hammered into a tube around an iron mandrel while the strip was still red hot. This hammering of red hot iron welded or fused the tube's seam together without actually melting the iron. There are several videos showing how this amazing process can be done by a skilled blacksmith. By today's standards, this was a crude way of making a barrel and therefore all barrels had to be proof tested to see if the welds would hold. The barrel tubes that made it past the proof stage then went on to work safely and reliably to this very day. Actually, these barrels were made by expert smiths who turned out hundreds of barrels a day in huge workshops. By contrast, the barrel of a modern reproduction is a seamless steel tube made of modern homogeneous, medium carbon steel. Being made this way and out of modern steel, a modern barrel would be several times stronger than an original gun's hammer-welded, wrought iron barrel. Steel anywhere near as good as what is used in a modern reproduction wasn't available to firearm manufactures until the 1850s when Colt introduced a high quality homogeneous steel they called "Silver Spring Steel" that was made from low phosphorus, low sulfur Swedish iron ore. As good as Silver Spring Steel is, I seriously doubt the old Colt steel is anywhere near as good as the steel used in modern reproductions. How a flintlock is able to set
gunpowder burning and
A flintlock works only because a
hard piece of rock, the flint, is able to scrape tiny bits of iron
off of a very hard frizzen face as the flint strikes and slides
down it. Because
the steel of the frizzen is so hard, scraping
off tiny particles of steel requires a lot of energy and that energy
comes from some of the energy you stored in the
mainspring when you cocked the gun. When these tiny particles
of steel are forced off the
surface of the frizzen, all the energy that is necessary to scrape
them from the hardened metal of the frizzen makes them extremely hot
and they start to burn in the oxygen of the air. Naturally,
these are called sparks and they are actually tiny particles of
burning steel and not hot flint chips (as some people believe) because
flint can't burn.
When the flint strikes the hardened steel of the firzzen, it also
causes the primer pan's lid to open, thus exposing the primer powder to
these hot sparks. The wonderful thing about black powder is that
even a single spark of burning steel starts all the powder in the
primer pan burning and it is the hot gases from the burning primer
powder that goes through the touch hole and sets off the main charge.what must be done to insure reliable ignition. If a flint is to perform this little miracle of nature, several factors must be right. First, the angle that the flint meets the frizzen is very important and it may be adjusted by altering the flint's shape and, to some extent, how the flint is held in the jaws of the cock. If the flint is not somewhat pointing down and especially if it is angled up when it meets the frizzen, it will tend to dig into the metal and the flint's sharp edge will dull or even shatter, thereby reducing the life of the flint. On the other hand, if the flint is too far angled down, it will simply glide over the frizzen and fail to produce sparks or produce very weak sparks that misfire and will fail to open the pan. Just lately I watched a YouTube video where an old guy who is otherwise an expert in 18th Century technology and he said things I absolutely did not agree with. One thing he said was that the orientation of the flint's bevel is simply up to the preference of the shooter. This is not correct. The bevel orientation must be part of several factors so that the flint strikes the frizzen at the correct angle and about half way up so that the pan is thrown open. Notice that if you flip up the flint as shown second from the left, it will hit the frizzen even higher up and at the same bad angle. The middle sketch is showing a flint with the bevel up and striking at the correct angle. To the right of that is a flint that may be a bit too short and is hitting the frizzen at the wrong angle with few if any sparks. If this flint is turned over with the bevel on the bottom, the angle is now correct and we will get good sparks.  Where the flint strikes and the angle which it strikes depends on several factors including the length of the flint, its shape and how it is held in the jaws of the cock. Those factors you can adjust and control, but one thing you can't control is your lock's geometry. I now own several flintlocks and every lock maker designs their locks with different geometries for reasons lost in time. Regardless of your lock's geometry, it is of utmost importance that the flint does not encounter the frizzen too high up and slam straight on. If the flint strikes too high up and at too great an angle, the frizzen will be gouged and the flint won't last long. If the flint hits too low and at too shallow an angle, production of sparks will be very weak or not at all and many times, the pan won't open properly. This ideal angle of the flint to the frizzen is actually easy to achieve and it involves the orientation of the flint's bevel in the jaws of the cock and also with the spacing material in the jaws. Although it is easy to adjust how the flint meets the frizzen, it takes careful observation and a lot of trial and error before you learn where that piece of flint should be. If you are new to flintlock shooting, you had better have a lot of flints and be ready to change flints often until you get everything right. One more thing that should be kept in mind is the fact that flints wear out. Every time the flint encounters the frizzen, a small amount of flint is chipped off. This is a good thing if everything else is correct because it keeps the edge sharp. Because the flint gets shorter and shorter as time goes by, the flint as it is held in the jaws must be adjusted and a the flint that once worked best with the bevel up will now have to be flipped over so the bevel is down. You will know when it is time to give your flint attention when the firearm starts to misfire and/or the sparks look weak and especially if the pan isn't opening all the way. After adjusting your flint, always check the flint's edge with your thumb. It must feel very sharp or it must be knapped, ground or otherwise sharpened before it can create good sparks. Traditionally, flints are sharpened as they were in the Stone Age by the process called "knapping." I have ruined countless flints by trying to knapp them myself, so I do it the easy and best way with a small and inexpensive diamond coated wheel I bought at Harbor Freight for just a couple of bucks. These diamond wheels very quickly shapes the flints and the edges are much straighter than done by the old "knapping" process. Flints shaped and sharpened this way will generally last you many times longer than if you try to knapp them with a brass hammer (unless you are a real expert). 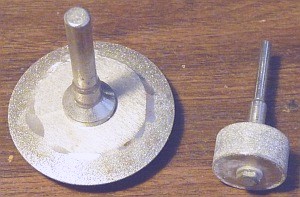 These inexpensive diamond coated wheels are ideal for quickly shaping and keeping flints sharp. If you are really serious about making, modifying or maintaining your flints in optimum shape and condition, I recommend buying a 6" steel diamond coated disk with a 1/2" to 1/4" arbor. They are cheap and the flints you shape yourself are the best possible. Grinding is fine, but when you are out in the field or at the range and far away from your workshop, a really excellent "knapping" may be done with no tools at all. A really easy, very fast and effective way of "knapping" a flint that has become dull and won't spark reliably is to allow the pan to be slightly open and then allow the flint to strike the frizzen low down. This will tend to lightly shatter the tip of the flint and create a new and sharp edge. For me, this technique works better and is a whole lot faster than trying to "knap" the flint with a small hammer. If your firearm is loaded, shake out the primer powder in the pan to prevent a discharge, but keep in mind that a discharge is possible, so always, keep the muzzle pointed in a safe direction. Open the pan slightly with your finger at the top of the frizzen where it won't be struck by the flint, bring the cock to full cock and then press the trigger. You should see some good sparks and the edge of the flint should be noticeably sharper and thinner, but if not, try it again. Close the frizzen all the way on the pan and try it again to insure your lock is now sparking well. When it is sparking, reprime, aim and discharge the piece. While on the subject of flints and shaping them by knapping or with a diamond wheel, I have found that flints with a long slope and flints that tend to be thin last the longest and produce the most reliable sparks if held at the right angle in the jaws. The problem with cut stones is that in order to give you two striking surfaces, their angles are too large and they don't slope enough and they tend to be too thick. Lately I have been using hand knapped black English flints and I consider them my favorite kind of flint. If you decide to use hand knapped flints, be prepared to grind the tops and bottoms of some of them with a diamond wheel because some of them will not fit well in the jaws otherwise. Formerly I used cut agate and I've also used cut Arkansas stone flints. Both types are good, but the cut stones are double sided which makes them too long when new and too short when one end is worn out. Whatever kind of "flint" you use, they are all made of a kind of quartz that is called "microcrystalline" or "cryptocrystalline" because you need a mineralogical microscope or a X-ray diffraction device to see the tiny crystals. The packing of these tiny crystals together makes the "flint" tough and not so prone to shattering, but some forms of microcrystalline quartzes are tougher than others. If you have a supply of agates, you can cut your own superior flints. I suggest you make them with one edge only and relatively thin with a long sloping ramp going to a sharp edge. By the way, the cock screw that holds down the flint usually has two ways of tightening and loosening it. There is usually a screwdriver slot at the top, but I suggest you use it only if it is deep enough to get a good bite on a screwdriver. On my locks, I enlarge the slot with a hacksaw blade and then I harden the top of the screw so it doesn't get bunged up. A better bet is to use a hardened steel rod that fits the hole that is almost always drilled into the top of the screw. Make the screw tight so the flint can't get loose, but not so tight that you strip the threads or break the top of the screw's head (been there, done that). You already know that it is impossible to clamp down on a piece of hard rock with pliers so that the rock can't move in the jaws. The surface of a flint is too hard and too irregular to allow it to be held in the jaws of a cock without some kind of soft spacer that conforms to and holds the flint rock tightly in the jaws. The traditional and most widely used spacer material is a leather strip. Leather works great and it is what most people use. I've even used artificial chamois made for washing cars and found it as good or better than real leather. In the days when the flintlock muskets were used in war, a lead strip was used instead of leather. People claim that lead strips are actually superior to a leather because they better conforms to the irregularities of the rock and thus holds the flint in the jaws better. I tend to agree, but only in the larger jaws. Leather strips have always worked well for me in my small locks, but I was having trouble keeping flints aligned in my 1777 musketoon. I made a lead strip by pounding flat a .45 round ball and bent it to conform to my flint. I also snipped out the back of the formed strip with a diagonal cutter to allow room for the jaw screw. I have to admit that the lead strip is superior to the leather strips in musket sized jaws. As long as you have something that conforms to the shape of the flint and the jaws and allows the flint to be held in without moving around, there are a lot of materials that work fine, but you must use something. As important as it is to have a good, sharp flint placed in the jaws just right, you must have a very hard frizzen because iron particles scraped off a soft iron frizzen will not be hot, they will not burn in the air creating sparks and the powder in the pan will not ignite. On the other hand, metal particles scraped off a very hard frizzen will be hot and burning and the sparks from the burning steel will quickly set off the powder in the pan. If your flintlock has a good, sharp flint striking at the right angle, but does not spark well and the face of the frizzen looks really scraped, gouged and rough, the frizzen needs to be removed from the lock and re-hardened. There are several people on the Internet who do this and most local gunsmiths can do it too. Re-hardening can be done in a little home shop with very simple tools and supples in just a few minutes, but should only be attempted by those who are used to working with red hot metal and big blowtorches and have a safe place to work. I will address the subject of frizzen hardening at home in much more detail in the repairs section of this article for the do-it-yourselfers. To conclude this section, let me say this: if everything is done right, ignition of a flintlock is nearly as certain as a caplock, but you must have a good, sharp flint in the jaws held at the right angle and the frizzen must be hard. If everything is right, flints will last for perhaps a half a dozen shots before they will have to be adjusted for proper angle or replaced with a fresh flint. Safety and operational concerns regarding
flintlock firearms Use only real black powder:Experimenting is fun, but don't experiment with anything but real, genuine black powder. Never ever try to use black powder substitutes or (may the gods forbid!) smokeless powder. Real black has the lowest ignition temperature and is the gunpowder that is most easily set off. All right, but why is it so important that only real black powder works and is safe to use in a flintlock rifle or gun? There are several factors why you must use the real thing: first, sparks from the frizzen will not reliably set burning anything but real black powder. Second, the hot gas from the burning powder in the pan cools while traveling through the touch hole and by the time the hot gas gets to the main charge in the barrel, it is too cool to set off anything but real black powder. If you load with anything but real black powder, your charge won't go off and you will be stuck with a powder charge in the barrel that you can't set off. What to do if you loaded the wrong powder: If you have a flintlock with a removable touch hole liner, you are in luck because it can be unscrewed and the bad powder can be dumped out and a charge of real black powder can be put in to fire the piece. If you have a historically correct musket, you won't have a removable liner and you will be in for a lot more work. Some times you can force a small amount of real black powder through the touch hole with a thin brass rod. If you are lucky, the piece will fire when there is enough black powder in the barrel to act as a "primer charge." If that doesn't work, you will have to use a screw tipped bullet puller to get the bullet out of the barrel and believe me it will be a royal pain (and I know because I've pulled a few myself). How much to load: To be honest, I would hesitate and I absolutely do not recommend shooting full military loads in an actual 18th Century musket with a wrought iron barrel because without extensive X-ray inspection, it is impossible to know if the breech can stand even black powder pressures. It is entirely possible that your antique was cleaned with water and over the years the salts and acids formed by water reacting with the fouling salts (H3SO and H2SO4) ate away at the breech and made it too thin to be able to resist chamber pressures. Modern reproductions have a strong breech made of modern steel with a threaded breech plug and even if cleaned with water, not enough time has accumulated to rust out the breech. A very good rule of thumb is to load the same amount of powder in grains as the caliber in inches. For pistols, this should be less. The so-called "military loads" were for early powders that might or might not be of the same quality that today's powders are. If you load a musket to the military standard of 120 grains of modern black powder, it will kick like a mule, bruise your shoulder and take all the fun out of shooting. I recommend 50 grains in a 50 caliber rifle and no more than 70 grains in a musket. In my light 1777 musketoon, I shoot 50 grains of 2F and it kicks plenty (and I mean plenty) with one of those 1.1 ounce balls and that hard metal buttplate! Headspace between powder and bullet: Unlike smokeless powder, there must be no "head space" between black powder and the bullet or an explosive detonation can occur that will bulge or fracture even the best steel. I urge you most sincerely to seat your bullets all the way down because life is too short and even if you do survive, who wants to go through what's left of life blinded and without hands? Even if you are really lucky and only spend a week or so in the hospital and don't lose anything important, your several hundred dollar musket and especially your reputation as an intelligent and responsible gun owner will be ... ah... 'shot' for life. A warning to those shooting blanks: I was just thinking about something I noticed when I did cavalry reenacting many years ago. We would put in full loads of powder so that we'd get a lot of smoke and a big bang, but that would build up very thick layers of hard fouling not seen in live firing and the build up would be surprisingly fast. Of course, it was part of "camp life" to clean the weapons in the field after a reenacted battle using hot water from the company coffee pot to flush out the thick layers of fouling. I would certainly never advise anybody to use hot water as a cleaning agent, but back then we did it as a quick way to keep our weapons clear and worried about doing a proper job of cleaning and oiling only after we got home from the big event. Because firing blanks really builds up fouling thick and fast, a barrel obstructed this way might become dangerous especially if the reenactor neglected his weapon and let the fouling build up over a couple battles or more without cleaning. An obstructed barrel will bulge or blow up regardless of what it is made of or where it is made. The very best Italian steel will blow as quickly as Indian steel so you reenactors who shoot blanks, please do not neglect your weapons and remove all fouling after a battle even if you have to pour hot water down your musket. Hangfire: Finally there is this, flintlocks will "hang fire" and misfire and there will be "flashes in the pan" and each of these can present their own safety concerns. A "hang fire" is always a possibility and it occurs when the primer charge burns very slowly and fitfully and may even go out. If the piece goes off at all, there is an excessive delay between the time the primer charge starts to burn and the main charge goes off. While the primer charge is sputtering, you must assume that the piece will eventually go off and so you must keep the piece pointed down range. Flintlocks will do the most amazing things and eventually you will see things that really surprise you. For example, just recently I had a little fire going in my primer pan that burned rather slowly but with a lot of smoke. To my utter amazement the fire in the pan went out and did not set off the rest of the powder in the pan. This had never happened before and I wouldn't have believed it if somebody had told me, but now I can say that such things really are possible. As easy as it is to get black powder to burn, you would think that a nearby fire would surely set off a pan full of powder, but it didn't. On the other hand, never "bet your life" that a stray spark won't set off an unprotected can or flask of powder. Flash in the pan: If the primer charge goes off normally with a big poof of smoke and flame, but the main charge does not, you have a "flash in the pan." Many times the main charge will go off after a long delay, so be careful. When you have a flash in the pan, you must assume that the gun will eventually go off and so it is vitally necessary to keep the gun pointed down range. I recommend keeping it pointed in a safe direction for at least 30 seconds. A flash in the pan can be caused by two things, a clogged vent hole and, most commonly, failure to put powder in before the bullet. At first you must assume that there is powder in the barrel and so carefully check out the vent hole and see that it isn't obstructed with fouling and if it is, take a vent pick and clear whatever might be in the vent. After clearing the vent with your pick, reprime the gun and try to fire it again. If the gun still won't fire even after clearing the vent, you should assume that you forgot to put the powder in. This is a very common mistake especially when you are too rushed. It is when this happens it is then that you are glad your flintlock's barrel has a removable insert (or are sad it doesn't) and that you brought all your tools with you. To get yourself out this situation of having a loaded barrel without its powder, you can do one of three things (in the order of increasing annoyance): 1) if you have a vent insert, you can unscrew it and pour in enough powder to discharge the bullet (easiest method, by far), 2) you can use a bullet puller, pull the bullet out and reload the pistol (what a pain that is), 3) you can take a small amount of fine powder, fill your primer pan with it and with your vent pick, force the powder into the barrel grain by grain through the vent hole (no fun, but necessary if you don't have a vent insert). This is why the breech plug is wedge shaped, so there is room for a small amount of powder even if the bullet is down all the way in the barrel with no powder behind it. Common causes of misfires: If it is windy out and especially if your flint needs attention and the frizzen isn't sparking well, you may get a the kind of misfire where the primer charge fails to ignite. A misfire should be treated as a hang fire and you must wait a number of seconds to see if a spark is smoldering and will eventually set off the piece. If, after several seconds or so, the primer charge hasn't gone off, check the pan to see if you have enough powder in it, take a look at the edge of the flint and if it looks OK, close the frizzen, cock the piece and try again. If it still won't go off, dump out the primer powder and give some attention to the flint or replace it with a fresh one. Protect your eyes: With chips of flint flying and burning particles of black powder that may be blown back into your face from the primer pan, it is absolutely essential that you wear eye protection. If your eyes are protected and you have on some kind of hearing protection, your well maintained flintlock can't possibly hurt you when it goes off (providing it doesn't kick too hard). With the confidence that your eyes and ears are protected, you can keep your eyes open and keep the piece on target all the time the primer is burning and then follow through as the piece goes off while still pointed at the target and you must do all this without flinching. Bullets and bullet metal for
hunting
If
you are shooting a rifled flintlock, you can shoot elongated bullets
that have several advantages over a round ball. The elongated
bullet
is heavier for its diameter giving it two big advantages over a round
ball. First, an elongated bullet has what is called
a better
ballistic coefficient. This
translates into a bullet that can travel further and retain more of its
initial velocity and energy than a round ball. In other
words,
the elongated bullet
is
much more effective at a longer range. A second advantage of
an
elongated bullet is what is
called
improved sectional density and that translates into improved
penetration of the bullet so that even a bullet that has slowed down at
long range
can penetrate deeply into a target and kill it. Round balls
have
terrible ballistic
coefficients and terrible sectional density and lose their energy and
ability to penetrate rather quickly,
especially in calibers under .57. Smaller round balls are
generally only effective out to ranges of 50 yards or less even when
shot from rifles.
If you are shooting a large caliber smoothbore, you must shoot round balls because elongated bullets will tumble and lose their effectiveness as soon as they leave the muzzle. This is because smoothbores don't have rifling to spin up and stabilize long bullets. Large round balls certainly lack the ballistic coefficient and the sectional density of elongated bullets, but because of their large diameter and the resulting very heavy mass for their caliber, they sort of make up for it. Of course, round balls shot out of smoothbore barrels lack accuracy at long distance, but within their useful range (about 50 yards maximum), they are very effective. Elongated rifle bullets can be of two types. The first is a soft bullet that is started in the barrel under force so that it "engraves" into the rifling and thus fits the bore perfectly. A good example of the engraved bullet is the REAL bullet. The other kind of bullet commonly used with rifles is the saboted pistol bullet where a smaller caliber modern hollow point pistol bullet is embedded in a plastic carrier (a sabot pronounced 'saboo') that fits the bore and spins the bullet up as it is shot out. The problem with saboted bullets is they must be shorter and lighter than a full sized engraved bullet, your rifle's barrel must have a very fast twist and many people aren't happy with the sabot bullet's accuracy (or cost) and then there's the plastic that builds up in the rifling. Of course, there are Minie bullets too, but they are seldom used for hunting because their rear skirts tend to get blown out under heavy loads. Then there is the question of the metal that goes into a bullet. The traditional bullet metal is pure lead, but in more and in more places around the country it is illegal to hunt with lead bullets. An advantage of the sabot is that it can carry a lead-free copper bullet. Of course, the lighter copper sabot bullets have poor sectional density (penetration) and poor ballistic coefficients (poor long range performance), but they are effective and legal. For smoothbore shooting, nothing but round balls will work, so hunting with lead-free bullets hasn't been an option for me, but perhaps that is about to change. Just lately I bought two pounds of a bullet alloy that is lead free and should be legal anywhere where there are lead restrictions. I have already cast and shot some round balls for my .69 smoothbore, but because my bullet mold is a bit too big, the fit it very tight. The reason the fit is so tight is because the lead free metal is an alloy of tin and bismuth, but unlike lead, it does not shrink when it cools after being molded. I have a round steel punch that works wonderfully as a bullet sizer and I've used it to shave off a "belt" that allows the ball go down the bore more easily. A lead ball weighs 1.1 ounces whereas the alloy ball weighs a bit over 0.9 ounce, which is still quite heavy and will easily do the job at the ranges the musket is useful for. I like these lead free bullets, but they are very hard and brittle, which is fine for musket balls and patched round balls, but I don't believe they will work in rifles as "engraved" bullets (REAL bullets, for example), but I will experiment with them and see what they will do. The importance of "Fouling
Management"
As in all black powder weapons, the flintlock
rifle,
pistol or musket will tend to build up hard fouling. In the
case
of rifled barrels, this fouling will cover the rifling and destroy the
piece's precision and accuracy in addition to making it hard to load.
To maintain accuracy and your ability to load a round, you
will
have to stop shooting and clean the barrel. In the case of
the
smoothbore pistol or musket, fouling means that you have to use
undersized round balls which also destroys accuracy and the leakage of
gas from the burning powder past the ball (called "windage") will
reduce the muzzle velocity. If you use tight fitting balls in
a
smoothbore, eventually the fouling will get so thick that you won't be
able to get a ball down without excessive measures and at that
point, you will again have to stop shooting and clean the
barrel.We can achieve good fouling management by the use of the right substances applied in the proper manner. In the following paragraphs I will present my ideas to minimize fouling and maximize precision. What I am about to suggest is very controversial because it has been my experience that to keep fouling soft, your flintlock's bore needs a residual of grease after the bullet passes.grease behind the bullet. Certainly, grease on a patch tends to "clean" the bore as it goes down and many times this is enough to allow you to keep shooting, but sometimes this isn't enough and in the case of unpatched bullets, application of grease under the bullet is necessary. Before I continue, let me submit a proposal for your consideration. I think that we use the term "Bullet Lube" way too loosely. Crisco, lard, Bore Butter, Spit Ball, Etc. should Not be thought of as "Lubricants", but rather as "Fouling Modifiers" or "Fouling Limiters". They do what they do not by reducing friction, but by transforming hard fouling into soft grease. How about calling them "Fouling Sanctifiers" for turning bad fouling into something good? From now on, I'm going to try to avoid using the term "lube" altogether and call it what it is, grease. What the bore really needs is Shooting grease
What I call 'shooting grease' can be as
simple as
an eatable fat all by itself. Products
that are proved to work include tallow, Bore Butter, Crisco, Spit
Ball and lard, but I recommend that those products be used by
themselves only in cool to cold weather. All experts agree
that
you shouldn't coat your bullets or your firearm's bore with petroleum
based oil
or grease or alox.
Eatable fats dissolve and soften fouling whereas petroleum
derived
oils are reported to thicken into a kind of tar. Lately I've
read where it's OK to use water pump grease, but water pump grease
contains lithium and lithium is toxic. Thanks, but I'll leave
water pump grease to
others to try as I'm sticking to the traditional non toxic stuff.Some time ago I made up a custom blend of what I guess is about 85% Crisco and 15% beeswax (by volume) for use during warmer days (above 60F or 16C). For my revolvers and small rifled pistols and my.45 flintlock rifle the stuff works way better than anything I've ever used and as an added bonus, I am able to use more grease without contaminating the powder below. For a while there I though I was all wrong about using shooting grease in my .69 musketoon since there seemed to be a hard wax and fouling layer that would build up in the lower part of the barrel. I had to use rubbing alcohol to get rid of this hard, waxy buildup. Lately I have experimented with using a whole lot more grease when I load the musketoon. I wasn't using a proportional amount of grease compared to my smaller caliber revolvers and other black powder firearms, but when I started using more shooting grease, the hard waxy fouling went away. Loading and firing the flintlock
Only real black powder should ever be used in a flintlock firearm. In every case, I begin
with the cock on half cock and the frizzen open:
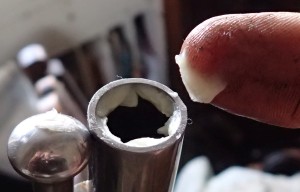 Grease clinging to the inside of the muzzle after the powder was put down. The ball will follow. I'm using way too little shooting grease in this photo and discovered that more is more better.
The gun is now loaded and primed, the frizzen down, the cock on half cock and the piece is ready to fire. While concentrating on what the target looks like sighting down the barrel and automatically increasing trigger pressure, the cock will be released, the flint will strike the frizzen and (most of the time) sparks will set off the primer charge and the main charge will go off sending a ball shooting out of the muzzle and hit the target -- or miss it, as the case may be. In actual fact, it isn't quite as simple as all that. With a flintlock there is a huge amount of "lock time" (that time the trigger is pulled and the bullet actually leaves the barrel). During this long time period the shooter has plenty of time to flinch (hence the name "flinchlock) and for the shooter to lose his concentration. When shooting any kind of flintlock, it is of supreme importance to fight your tendency to flinch with every power of concentration you have. You must keep your eye on the target and your mind completely focused on what it looks like staring down that barrel. Your finger must start with pressure on the trigger and then gradually increase it without you even thinking about it so that when powder in the pan goes off followed by the main charge, you are still concentrating on the target and the firearm sort of goes off by itself. Concentration and actively holding the flintlock piece on your intended target at all times is the secret and what you must do or learn to do. I have written this elsewhere, but it bears repeating because it is so important and important in helping you overcome flinching: With chips of flint flying and burning particles of black powder that may be blown back into your face from the primer pan, it is absolutely essential that you wear eye protection. If your eyes are protected and you have on some kind of hearing protection, your flintlock can't possibly hurt you when it goes off (providing it doesn't kick too hard). With the confidence that your eyes and ears are protected, you can keep your eyes open and keep the piece on target all the time the primer is burning and then follow through as the piece goes off while still pointed at the target and you must do all this without flinching. Cleaning
A highly convenient and effective method that proves that shooting black powder is not the mess people think it is.
There is absolutely one cleaning technique that I
avoid and that is the use of any kind of water or water & soap
solutions. I
do not take off the barrel and, for sure, I do not put the breech end
in a bucket of water as seen in many videos.
I use vegetable oil as my cleaning solvent or in the case of
my
musketoon's thick waxy fouling before I started to use more grease, I
used isopropyl alcohol as a wax solvent. This is a
method that I
believe is far superior than using water in terms of
protecting the steel from rust, but I don't need to use it any more.
Cleaning with vegetable oil (or isopropyl alcohol when the going
gets tough)
will
not smell up my house and they are
especially superior in terms of speed and convenience. Speaking
of isopropyl alcohol, I suggest you be very careful it
doesn't drip onto the stock or you remove the barrel
first because alcohol is a strong solvent that will damage your stock's
finish.
After shooting black powder, I try to clean my firearms as soon as I get home, but sometimes I have to wait a few hours before I can do it. If the barrel has a greasy layer in it, and if a greasy fouling remains on the outside of the barrel from the primer pan and smoke blown out the touch hole, a slight delay in cleaning shouldn't cause a problem. I start my cleaning by sending down a patch on a jag or a small rag screwed into my worm. If the fouling is soft and greasy, I simply continue to use clean patches until the last one comes out reasonably clean. This is usually requires only a few patches. If the fouling is thick and hard and it is a small bore (.50 or smaller), I will use an eatable oil like jojoba or olive oil as a solvent, If vegetable oil doesn't seem to be dissolving a hard fouling (especially if it is waxy), I soak a patch in isopropyl alcohol as described above. Of course, some people swear by the commercial cleaners and especially Ballistol mixed with water to make "Moose Milk." I urge you to experiment and discover what works best for you in terms of effectiveness and convenience. Once the last patch or rag comes out reasonably clean (it will never come out completely clean), I take that patch and put shooting grease or eatable oil on it and run it down the bore to protect the iron and have the barrel ready for the next shooting session. As always, swab down the bore with vegetable oil (jojoba, olive, canola, Etc.) or shooting grease as your last step to prevent rusting, especially if you have used a solvent. The residue on the outside also requires removal and for that I take a small cloth or paper towel and put some eatable oil on it and then wipe everything down. Most of the time I do not remove the lock, but just wipe down the places I can get to without removing anything. Of course, I wipe down the outside of the barrel with special attention to the breech end and all around the cock. I wipe down the primer pan and the front side of the frizzen and all parts of the lock's outside. I avoid putting oil or grease on the frizzen face or the flint.  For calibers up to .50, a jag works great and especially if your rifle or pistol has a touch hole insert.  For a smoothbore and other flintlocks .50 caliber and larger, a worm is essential. This is especially true if your touch hole doesn't have a removable liner. Cleaning patchs made from pieces of an old towel screwed into the worm makes a disposable swab that is superior to using a jag with thinner cloth patches. I do not use elaborate tools, brushes or reusable (shotgun) swabs for cleaning, but a simple jag or worm with cloth patches works well enough. For my .69 musketoon I have found that a worm is absolutely essential. The worm can be used to hold terry cloth that is then screwed into it and if you lose it down the barrel or have wads that were left in after firing, the worm works marvelously for fishing out foreign objects. In my opinion that for any musket or rifle, especially those without a touchhole liner, you should have a worm with you before you take it out shooting for the first time and every time you go out afterwards. Of course, I do not use a worm with my smaller caliber rifles and pistols, but they all have removable touch hole liners and any lost or stuck patches can be pushed out once the plug is out.  A bullet puller is another necessary tool for those emergencies when you must remove a stuck bullet or unload your muzzle loader for any reason. Lubricating the lock mechanism
I am still experimenting with a suitable lubricant for
the inside of the lock. I have tried light gun oil and a dry
lubricant, but nothing really lasted very long
before I felt there was excessive friction inside the mechanism.
Just lately I oiled everything with a few drops of a light
synthetic motor oil I use in my car and so far it is working great.
Synthetic oil, not being a distillate mixture of oils that
includes some heavy fractions, should not get thick over time nearly as
quick as will ordinary oils, but time will tell and I may have to use
something different.
Of course, as I've said elsewhere, experimenting with black
powder firearms is half the fun of owning them.
Repairing your flintlock
Flintlocks are quite reliable and seldom need any
repair beyond attention to the flint. Having said that,
springs
do break and there may come a time when that really heavy trigger pull
you once thought you could live with is just too much.
The flintlock has three springs that at some point may break or need attention. These springs include the mainspring, the trigger sear spring and the frizzen spring. The mainspring and the trigger sear spring are inside the lock and are shown in the figure below. The mainspring is the heaviest of all the springs and it sometimes does break. The trigger spring is much smaller and it too sometimes breaks. The frizzen spring is located on the outside of the lock, it is a small, but robust spring that rarely breaks. No spring can be repaired by welding the broken pieces together, but replacement springs are available and they can be fitted to a lock by a gunsmith or by you, if you are a careful worker who can handle small tools with a delicate touch. If you have no experience or talent working with small metal objects, replacing and fitting in new springs is better left to a gunsmith or other skilled person. By the way, small sheets of spring steel stock are available, so it is possible for you to make your own springs and I have done so, but it is far more time efficient and so much easier to simply buy a replacement spring.  The inside of the lock showing the internal parts. Where the mainspring interacts with the tumbler and where the trigger sear interacts with the tumbler's sear are high friction and wear points and requires a good lubricant. Sometimes it is necessary to remove a good spring so that other parts in the lock can be worked on. To remove a spring (especially the mainspring) without breaking it is a delicate task requiring special tools and a lot of thought and care must be exercised. Anytime a spring has to be removed or installed, a special tool must be used. The tool must have soft steel jaws, the compression must be at the end of the spring's travel and only the minimum compression should be applied. The traditional and perhaps best tool to use is called a spring vice shown below.  A traditional mainspring vice. Quick, easy to use and safe, but this style is for mainsprings only. 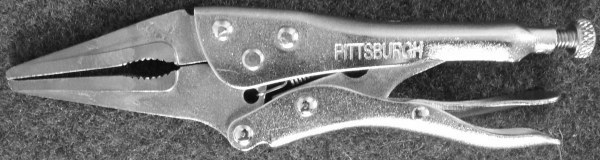
The dreaded "locking pliers." Gunsmiths
shudder at the sight of one of these.
I have made my own
tool out of long nose locking pliers, but I went to a lot of trouble to insure that it can't damage a
spring and I really think about it when applying it to a spring.
To make the steel of the jaws softer than spring steel to prevent
scratching the spring, I heated the jaws to near white hot and then
let them
slowly cool between two fire bricks. I also filed down the
sharp
ridges inside the jaws so the clamping force would be more evenly
distributed. This tool is quick, versatile, easy to use,
cheap
and safe, but only if it is used carefully and with a lot of thought.Whenever removing or installing a spring, take your time and really think it out before applying any tool, or you will end up with a snapped or otherwise damaged spring. Keep in mind that an overly compressed spring can snap and scratches from a hard tool on a spring's surface can cause it to fail at some future point. Micro-blacksmithing
As mentioned earlier, all parts of early black
powder
rifles and muskets were made of wrought iron or started out as wrought
iron. This is because, in the early days, steel making was
very
difficult and reserved for making the small lock parts.
Wrought
iron is very easy to hammer into shape
(thus the word 'wrought') and once formed, it is very tough, soft but
tough. The
surface of this kind of iron can be turned to steel by the process of
"case hardening" or carburizing where carbon is added to the surface of
the metal when
it is red hot and then that surface is made super hard by quenching the
red hot piece in water. The process of carburizing the
surface of
iron makes parts that are tough and hard, don't wear out and will spark
when struck by flint. The case hardening process was well
understood by the smiths of the 18th Century with their big forges, but
today we can do the same thing with simple
gas torches and inexpensive hardening compounds. Rehardening a Frizzen Modern low carbon steel is much tougher and more homogeneous than wrought iron, but it is too is soft and will not spark unless it is further carburized. A very common problem you may have to deal with, especially with a new flintlock, is the hardness of the frizzen. Many, if not most frizzens come from the factory with a very thin hardened layer that soon wears through exposing the soft low carbon steel (or wrought iron) inside. 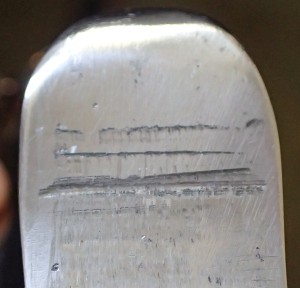
If you have a badly gouged frizzen such as shown
above,
you should grind it smooth with a wheel and then deeply
harden it and don't neglect to harden the bottom of the frizzen. Actually, hardening this part is
not that difficult, but it must be done correctly and you must have the
right tools, setup and supplies. For years I used Kasinit, but
you can't get it any more so now I use a hardener I bought from
Brownells' website. Brownells hardener is a proper substitute for
my old Kasenit (no longer sold) hardener and the process is
exactly the same.
First, you must have a really large and hot propane torch. I formerly I used MAPP gas, but it is no longer manufactured and that wimpy MAP gas that substitutes for it is both terribly expensive and hardly a degree hotter than straight propane. Lately I have been using two crossed torches to make a really hot and large flame and that works very well. 1. With the frizzen held firmly in the jaws of locking pliers and its striking surface upward, put a generous amount of hardening powder on the striking surface of the frizzen. 2. With a very large torch, such as the one shown, heat the frizzen to a bright red temperature. The top of the frizzen generally gets hot first, but you must insure that the heel is also red hot too because that is where the hottest sparks are generated. Using two torches so their flames cross works extremely well. 3. When the hardening powder starts to melt, turns black and gets bubbly, it will start to disappear, so use a flat piece of metal to sprinkle additional hardening powder on the frizzen face and continue heating. Spread around the black blob of melted hardener with steel stick until most of it is gone before adding more hardening powder. 4. Keep this process going for 5 to 10 minutes or longer. 5. After you think that a sufficient time has passed, turn off the torch(s) and with a stiff wire brush, brush the scale off of the frizzen while the frizzen is still hot. 6. Reheat the cleaned frizzen to a bright cherry red and then quickly plunge it in cold water to give the striking surface a very hard and deep case hardening. When done, the entire frizzen is burnished with a steel brush and then tested with a file. If it is harder than a file, the work has been successful and no further hardening needs to be done. After hardening, if the frizzen is supposed to have an Armory Bright finish, I will polish only the non-striking surfaces with polishing compound and a motorized wheel. I do not polish the striking surface of a frizzen. If the frizzen is for an dark steel lock, I'll burnish it with a wire brush that will leave it with a hansom black finish. I watched a video the other day where the guy suggests that some of the hardness of the frizzen be taken out so the part won't shatter. First of all, I've never had a frizzen shatter no matter how hard I made it. With case hardening, only the outside is hard, but the inside steel is soft and tough and resists shattering. I have tried "tempering" a frizzen to see how well it would spark and no matter how lightly I tempered the steel, it would not spark. My suggestion is to make the case hardening just as hard as it is possible. Use a a lot of a good hardening compound, high temperatures and rapid quenching in cold water. Micro-blacksmithing
You
should be able to, with a bit of strength, cock your lock with your 5th
finger (the pinkey), but if you can't, your lock may only need to be
lubricated. If that isn't it, your bridle may be holding the
lock
mechanism in too tight and you need do some filing and polishing to
make the mechanism operates smoothly. Finally, if you can't
cock
the lock without extraordinary force and everything else is good, the
spring is too strong. One reason a spring might be too strong
is
that it binds up due to the channel in the spring's fold limiting the
spring's travel.Adjusting Mainspring Tension  Channel too narrow,
metal too thick and binding.
Take a tiny diamond wheel saw on a small rotary
tool and open up
the rear of the
mainspring where the parts of the mainspring are touching.
You
may have to further open up this channel with a hacksaw blade until
you get it
almost to the inside of the bend. Be sure you remove as
little metal as
possible and yet still have a spring that compresses properly.
 Metal too thick If after a lot of
testing and a lot of thought you determine, FOR SURE, that you have a
mainspring that is still just too strong, the strength may be reduced
by VERY
CAREFULLY AND VERY SLOWLY filing metal off the TOP of the spring.
You should never take metal off the sides to make it thinner,
but
off the top only. Be sure you maintain the taper so that the
tumbler end is shorter than the end where it doubles around.
Be
sure your work leaves a smooth surface with no nicks. When
you
have a spring tension that is acceptable, even if it is a bit strong,
it is probably best to stop right there. By the way, I
modified the springs of my new .69 musketoon and my Hawken .45
rifle and I can report that the mainsprings are now easier on
the
flints, they are easier to cock, the frizzens spark better than ever
and I'm glad I went to the trouble.Micro-blacksmithing
As mentioned earlier, the angle that the flint strikes the
frizzen is very important and placement of the flint in the jaws must
be done
properly to insure you have good sparks and your flints last. It
is my belief that the
upper
part of the frizzen is for
opening the pan, but not for creating sparks so try to have the flint
first encounter the frizzen about half way up. The lower part
of
the
frizzen is where the hot
sparks are
created and you should look for scrape marks or a kind of polish down
there to see if your mechanism is tuned up properly.
Naturally,
this area must be hardened properly and not just the top and center
part of the frizzen.Adjusting the Cock's Jaws If you have a hard frizzen and have done all the things to insure good sparks from a hard frizzen, you might also look into how the top jaw is positioned in the cock and how that affects the angle the flint is held in the jaws. The overall geometry of the flint is important too. You want the top of the flint's rear thinner than the top front so the flint will be held at a down angle. 

I needed a much tighter fit between the top jaw's hole and the shaft of the screw if I wanted the top jaw and flint held in correctly. I considered brazing metal into the hole and then boring it out to the same diameter as the top of the screw shaft, I considered brazing metal on to the screw shaft and machining it to the same diameter as the hole, but, in the end, I used my little lathe and made a brass insert that fits tightly inside the jaw hole and has a bore diameter the same diameter as the screw's shaft. As you can see, the insert works perfectly. When I put the flint back in I noticed that it was held at a much better angle and when went to try the lock, I was very pleased at the large shower of sparks that the frizzen now throws. Who would have thought that flint angle and top jaw position was so important? I never did, but I do now. In addition to all that, I started shaping my flints so they had sharper angles and so the top rear is not as thick as the top front. By having the flints strike the frizzen at an acute angle rather than straight on, the flints last a lot longer, there isn't any gouging and, best of all, the sparks are numerous and hot. Conclusions and suggestions
Are flintlocks for every kind of
shooter? The short
answer is
no, they certainly are not. There are a series of things you
must
consider before deciding if a flintlock firearm is right for
you.
First, is the gun simply for display and if it is, just hang it up for you and your friends to admire. You won't need to know anything beyond what the firearm means to you. This can be a reflection of your interest in a specific period of American, European or World history or simply your interest in a flintlock firearm as a martial work of art. If you are an historical reenactor and want portray a period soldier and fire only blank ammunition, you will need to know about loading and priming and taking care that the flint is working properly. If you don't have mechanical skills, you had better have a "company armorer" who is really good, who can keep your gun operating properly for you and to whom you can go to for advice and help. You should be aware that the flintlock is the most complicated kind of firearm a shooter is likely to ever encounter. If you want to shoot ball ammunition (live rounds) at a range of some sort and without the support of an armorer or that "mechanical" friend of yours, you must have at least some mechanical aptitude and know how to use the small tools necessary to keep a flintlock working or else get another type of firearm. If you are the kind of shooter that likes to shoot up box after box of ammo as fast as you can, a flintlock is definitely not for you. Finally, if you aren't in the habit of cleaning your guns immediately after a shooting session and are a bit casual about how they are stored away, any kind of black powder firearm is not for you. If you are good with working with your hands, like to do so and have a good mechanical aptitude and you like to take the time to load, aim and shoot without being in a big hurry and if you enjoy the pleasure of a jolly blast of fire and smoke, a flintlock might be just the ticket. For me, a half dozen shots out of any of my black powder firearms, including my revolvers, pistols, rifles and musketoon, is far more satisfying than a whole box of cartridge ammo that I can shoot up in the time it takes me to reload my musketoon just a couple of times.  My French model
1777 cavalry musketoon flintlock
After some extensive, but very fun work correcting a lot of minor things, I am very proud of this gun.  Paul's original Brown Bess I rebuilt All modesty aside, I am very pleased with how this gun turned out.  My Hawken flintlock built from a kit in the mid 1970s By adjusting the mainspring's strength, the angle of the flint and making the frizzen super hard, this rifle is vastly improved. 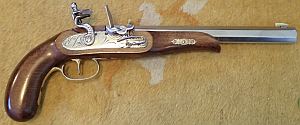
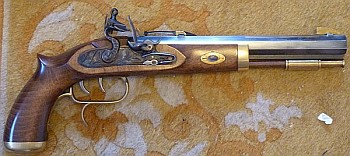
My Crockett flintlock I converted from a
caplock.
My Trapper flintlock after "defarbing" it. I have converted a second pistol so that I now have a It looks good and shoots well. At .50 pair of "dueling pistols" any gentleman would be proud of. caliber, shooting a heavy elongated bullet and with 60 grains of FFFG powder behind it, we have a very deadly hunting pistol here. I've filed all the "farby" barrel stampings off of my dueling pistols and my "Trapper" pistol.
I polished the barrels and locks of my dueling pistols to a mirror finish, but for the Trapper, I used a chemical to "brown" the barrel to give it that "late 18th Century" look. I absolutely love the way my pistols now look and it was well worth the effort to make them so. As always, I hope this article was useful to you or at least encouraged you to consider black powder shooting. It is my sincere desire to help people realize that black powder firearms can be quite as accurate as a modern smokeless firearm, but more fun to shoot and not the big mess they think it is. Black powder firearms, especially flintlocks do take work to shoot and care for properly, but many people find that the extra effort is half the fun and if done right, it isn't nearly as big a chore that many people think it is. Please have fun, but always think safety and always keep in mind where the bullet will hit if your firearm should go off unexpectedly. Always keep your powder where sparks can't possibly reach it or you may be badly burned or worse. Best Wishes, THE END
(for now)
If you have any detailed comments, questions, complaints or
suggestions, I would be grateful if you would please
E-mail me directly If you liked this story, you might also like to read about my musketoon project  French Model 1777 Cavalry Musketoon made in India You might be interested in how I recently rebuilt my friend Paul's flintlock  Restoring Paul's original India Pattern Brown Bess You might be interested in how I took a couple of caplock pistols and converted them to flintlock so that I now have  A pair of 18th Century style dueling pistols two identical Caplocks converted to flintlock  The Defarbation of the Trapper Flintlock Pistol or how I made my pistol look and perform like one of the 18th Century's best You might also like to read one more of my  Black powder revolver articles. or you can go to my shooting articles selection page There are lots of other things here you might be interested in and no commercials Please go to my Home Page for more exciting adventures. |